
Tackling an old chain link fence removal can seem daunting. With the proper techniques, however, this task is possible. This article provides a five-step guide to make the process easier and quicker for you.
Let’s dive in!
Preparing for Fence Removal
Before you start, make the space around your fence clear and ready. Remember to wear the right safety gear and have friends to help make the job smoother.
Clear the area
Clear the space around the fence of obstacles. Clear away tools, debris, and anything else that might get in your way. This step helps avoid trips and falls while you remove the fence.
Next, trim grass close to the fence and move plants or decorations to a safe distance. This will make it easier to access every part of the chain link for removal. Plus, it will protect your garden from damage during the work process.
Take safety precautions
Wear protective gear, like gloves and safety glasses. This keeps you safe while cutting the fence posts. Chain-link fences can be heavy, so remember to take breaks often to avoid getting too tired.
This helps make removing your chain link fence easier and safer for everyone involved.
Before starting, check that all equipment is in good condition. Using damaged tools can lead to injuries or make the job harder than it needs to be. Always keep a first aid kit nearby in case of minor cuts or scrapes during the removal process.
Safety comes first, so don’t rush through the steps—take your time to do things right.
Ask for help
After ensuring your own safety, get help. Removing a chain-link fence can be much easier and quicker with an extra pair of hands or more. Friends, family, or even neighbors might be willing to lend a hand—especially if you’ve got snacks as a thank you! Feel free to call in professionals if the task seems too big or complex.
They have the experience and tools needed to remove your fence efficiently.
Seeking advice from those who’ve tackled similar projects can also guide you on the best removal techniques. Someone may have specialized tools you can borrow for pulling out posts or cutting through metal.
Also, consider seeking assistance with recycling old fencing materials; some organizations accept metal scraps, which could save you a trip to the dump. Working together not only speeds up the process but also makes it safer and more manageable.
Tools Needed for Chain Link Fence Removal
Removing a chain link fence requires specific tools. Gather everything you need before starting to make the job easier.
- Wire cutters or bolt cutters: Essential for cutting fence ties that secure the chain link fabric to the posts. These are necessary to remove the fabric task.
- Clamps: If you plan on reusing or donating the fence, you’ll need these to hold sections. Clamps keep everything organized and manageable.
- Fence pliers: These multi functional tools are perfect for twisting and cutting wire and pulling out nails or staples from posts.
- A car jack is surprisingly helpful in pulling out fence posts, especially those stubbornly stuck in concrete. Insert the jack next to the post, hook it up, and lift. The post should come out much more quickly than by digging alone.
- Sledgehammer: If your fence posts are encased in concrete, you might need a sledgehammer to break up the concrete before removal.
- Shovel or spade: Necessary for digging around posts to loosen soil or remove any remaining pieces of concrete after breaking them up.
- Safety glasses and gloves: Always protect your eyes from flying debris and your hands from sharp edges on the chain link fabric and wire ties.
Step-by-Step Guide for Chain Link Fence Removal
Our step-by-step guide quickly walks you through removing a chain link fence, from tackling the posts to dealing with concrete no guesswork needed. Dive in and see how simple it can be!
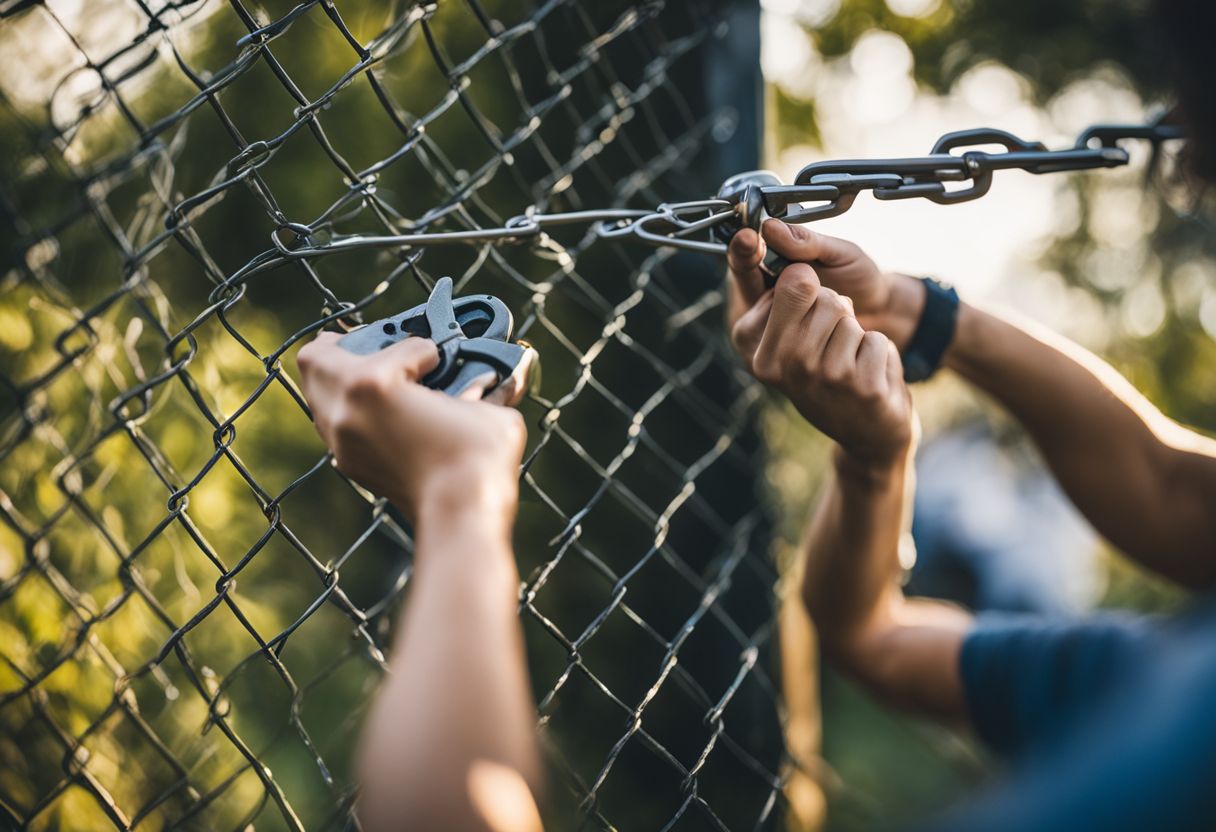
Remove clamps from corner post
Start by locating the clamps at one of the corner or end posts. These metal pieces hold the fence fabric tightly to the post. Use a wrench or a suitable tool to loosen and remove these clamps carefully.
This step is crucial because it frees one end of the chain link, making it easier to dismantle the fence.
Next, ensure you keep all removed clamps in a safe place—you’ll need them later if you plan on reusing or disposing of them properly. Work slowly to avoid damaging the chain link or posts, as this could complicate further steps in removing your chain link fence.
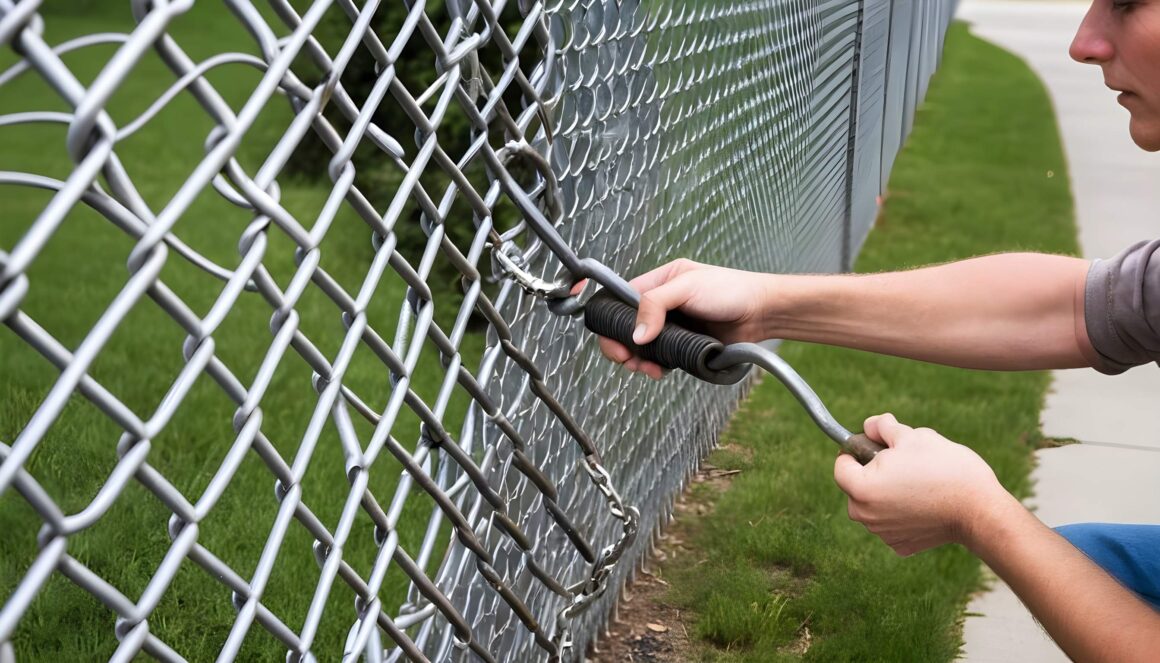
Cut fence ties and detach chain link
After removing the clamps from the corner post, next up is cutting the fence ties. Use wire cutters or bolt cutters for this task. This step is crucial for detaching the chain link fabric from its posts.
Carefully identify and snip each tie to free the fabric. Heavy-duty pliers work well too; they can bend back ties, making it easier to pull away the chain link.
For sections needing removal or shortening, opt for bolt cutters—they’re perfect for cutting through those stubborn links. Without these cuts, you cannot proceed to remove your chain link fence effectively.
Keep an eye out so no section remains attached because of overlooked ties.
Remove top rail and post caps
First, gently dislodge the post caps. You might need a rubber mallet for the ones that stick. To make it easier to access and remove the top rail, unscrewing these parts is essential in dismantling a chain-link fence.
It lays the groundwork for removing larger sections later.
Next, focus on the top rail running along the fence’s length. Taking down the rest of the fence without this metal bar becomes simpler. Roll up your sleeves—this step requires some elbow grease but marks significant progress in removing your old chain link fence.
Remove fence posts
Dig around the base of each fence post to loosen the soil. This makes it easier to pull them out. If concrete anchors the posts, you might need a digging bar or a shovel for leverage.
Rock each post back and forth until it feels loose enough to lift from the ground.
For stubborn posts set in concrete, break up the surrounding concrete with a sledgehammer or jackhammer. Lift out the loosened post along with any attached concrete. Dispose of old fence posts and concrete responsibly, either by hauling to a dump or recycling center that accepts such materials.
Break up concrete
Now that the fence posts are out of the way, it’s time to tackle the concrete. Use a jackhammer for large chunks of concrete around where the posts were. For smaller bits, a hammer and chisel work well.
You’ll need to break up all the concrete before you can fully clear the post area. This step is crucial for removing any traces of the old chain link fence and preparing the ground for new projects or fencing.
Breaking up concrete might seem tough, but with these tools, it becomes manageable. Just keep chipping away until all pieces are small enough to remove by hand or with a shovel. Make sure to wear safety gear during this process—gloves and goggles are a must.
With patience and effort, you’ll get rid of all concrete remnants from your yard.
How to Dispose of a Chain Link Fence
Find out the best way to handle old chain link—you can donate, recycle, or even repurpose it. Keep reading for more clever ideas!
Donate metal scraps
Giving away metal scraps from chain link fence disposal is good for the planet. Metal parts like posts and rails often go to recycling centers. This choice helps cut down on waste.
You can help the environment by donating these materials.
After sorting out the metals, consider recycling your fencing next.
Recycle fencing
Recycling chain link fence is smart and eco-friendly. Chain link fences, made from steel, can be fully recycled. Many recycling centers accept materials like chain link because it’s highly recyclable.
Taking down your fence? Consider recycling it.
Turning old fencing into something new saves resources. Instead of tossing out your removed chain link, take it to a local scrap metal facility or a recycle center that accepts galvanized or LLDPE-coated material.
This way, you’re not just disposing of the old fence; you’re contributing to sustainability by ensuring the metal gets a second life.
Repurpose or rent a dumpster
Repurposing chain link fences can be a creative way to give new life to old materials. Consider using the metal for art projects, garden trellises, or even as a sturdy base for climbing plants in your garden.
This approach not only saves money but also reduces waste, aligning with eco-friendly practices.
If repurposing isn’t an option, renting a dumpster from Mammoth Dump simplifies disposal. Their comprehensive services handle the removal of all fencing with ease, making it an efficient choice during landscaping projects.
This method ensures all your chain link fence material is disposed of properly without fuss, supporting both convenience and environmental responsibility.
Tips for Easy and Efficient Fence Removal
Want to make fence removal a breeze? Check out these tricks to speed things up and reduce effort.
Relocate plants
Dig out any plants or vegetation near the fence before starting your project. This step is key for a smooth removal process. It’s especially important if you have plants tied to the fence that need a new home.
Carefully move these plants to a safe spot. Doing this keeps them alive and healthy while you work on removing the chain link fence.
Separate fence caps and clamps
Once you’ve moved plants away from the fence, focus on the caps and clamps. These small parts play a big role in holding your chain link fence together. Start by loosening the nuts that secure the clamps around corner posts.
This action frees the chain link fabric attached to those posts. Removing these parts might seem minor, but it’s crucial for dismantling your fence smoothly.
Next, lift off all post caps with care. Doing this allows you access to remove other components more easily later on in the removal process. Each cap and clamp comes off with some effort—use pliers if they’re stubborn.
Keep them organized as you work; this makes reassembly or donation simpler if that’s your plan after removing the chain link fence.
Cut fence ties carefully
Cutting fence ties needs attention to avoid sharp edges. Use wire cutters, not bolt cutters, for this part. Identify and snip the ties along the chain link carefully. This method helps prevent injuries from sharp wires.
For cutting through chain links themselves, bolt cutters are your go-to tool. They make quick work of the job and save time during fence removal process. Always wear gloves to protect your hands while working with these tools.
Use pliers to remove chain link
Grab your fence pliers; they’re your best friend for this job. Use them to cut through the chain link easily, making sure you get every piece. This step is key in removing the chain link fence efficiently.
Next, tackle those stubborn fence ties with the same pliers. Weaving the metal bar out from between can help loosen things up. Then, snip away at the ties holding it all together. You’ve got this—removal just got a whole lot simpler!
Soak soil before digging
Soaking the ground makes digging around fence posts easier. Wet soil is softer, allowing for quicker removal of chain link fence posts. Experts and residents agree—wet the soil first to save time and effort during your DIY project.
This step can significantly ease the process of removing difficult-to-remove metal posts buried in hard ground.
Before you start your day’s work on removing a chain link fence, water the area thoroughly. Allow it to soak in well. This preparation step ensures you’re able to handle tough soil, making your job smoother and faster.
It’s a simple but effective technique that enhances efficiency in any fence removal task.
Conclusion
Removing a chain link fence doesn’t have to be a headache. With the right steps and tools, it turns into an easy task. Remember, work systematically—each technique adds up to your progress.
Taking down that old fence paves the way for something new and exciting in your yard. Ready for change? Let’s get started!
FAQs
1. How do I start removing a chain link fence?
First, remove the clamps around the post and cut the fence ties. This loosens one side of the fence, making it easier to handle.
2. What’s next after cutting ties and removing clamps?
Roll the fence vertically from the section you’ve freed up. This helps manage large sections without tangling.
3. Is it hard to remove chain link fence posts?
Not really! After you’ve removed all the chain link, dig around each post and rock them back and forth until loose enough to pull out.
4. Can I reuse or dispose of my old chain link fence?
Sure! If your fence is in good condition, consider advertising free fence material for removal. Otherwise, recycling centers accept materials like chain link.
5. What tools will help me cut through a chain link fence easily?
Fence pliers are great for cutting ties; a saw or bolt cutter can handle thicker parts like posts or heavily woven areas.
6. Any tips for making chain link removal easier if vegetation has grown into it?
Yes – trim back any vegetation along the fence line before starting removal efforts. It frees up space and reduces obstacles during work.

Anthony Phillip is a talented editor and writer known for his deep knowledge of home and garden topics. He earned his Master’s degree in Arts from Stanford University in 2006, and since then, he has made a name for himself in the writing world with a voice that is both trustworthy and motivating.
As the editor of Home and The Around Blog, Anthony knows how to tell stories that connect with people everywhere. He creates content that is easy to read and full of helpful tips and fresh ideas. His passion for home and garden goes beyond surface-level trends, Anthony truly understands design, functionality, and what makes spaces feel both beautiful and practical.
Anthony’s work does more than just inform; it inspires. He helps readers turn their homes into spaces that reflect their personal style and needs. His advice isn’t just theoretical; it’s based on real-world experience, making his guidance practical and easy to apply for anyone looking to improve their living spaces.
In a constantly changing industry, Anthony stays ahead by sharing his insights and creativity, consistently offering valuable tips and inspiration. His commitment to his craft ensures that he continues to influence and shape the way we think about home and garden, making a lasting impact on readers everywhere.