

Have you ever wondered if slapping new caulk over the old one can save you some hassle? Well, it turns out this quick fix isn’t always your best bet. In our guide, we’ll dive into the nitty-gritty of why removing that worn-out layer might just be the smarter move for a flawless finish.
Stick around and we’ll show you how to get those edges sealed perfectly—because nobody likes a half-stuck solution! Keep reading; it’s simpler than you think!
Primary Highlights
- New caulk doesn’t stick well to old, damaged caulk. Problems like peeling or mold can happen if the surface underneath isn’t clean.
- It’s important to remove old caulk for a better hold and look. The new layer will last longer and seal better on a clean surface.
- Not all caulks are the same. Pick the type that is right for your job. Silicone stops water but doesn’t stick to itself once it’s dry.
- Clean and dry the area before putting new caulk. Use rubbing alcohol for cleaning, especially if you’re working over silicone.
- If old caulk looks good with no cracks, it’s sometimes okay to put more on top without removing it first. But be careful since this might not work in all cases.
The Problem with Re-caulking Over Old Caulk

Going straight for the caulk gun and layering over existing caulk might seem like a quick fix, but beware—it’s often not as simple or effective as it seems. Diving into a re-caulking job without stripping away the old can lead to peeling, poor adhesion, and even unsightly mold down the road.
Not a long-term solution
Putting new caulk over old caulk might seem like a quick fix. But, it’s not going to last long. The new layer won’t stick well if the surface underneath isn’t clean and smooth. This can make the seal fail and water could sneak in.
Even when you put a fresh bead of caulk on top, if that bottom layer starts to go bad, your effort is wasted.
Think about what happens after you apply new caulk over old: it may look okay for a little while, but problems can pop up fast. If the base isn’t right, the top layer can peel off or get moldy because moisture gets trapped.
It’s like stacking blocks on an uneven table – eventually, they’ll topple over!
Can create more issues
Putting new caulk over old might seem like a quick fix, but it’s not that simple. The old layer often has cracks or is worn out. If you just cover it up, the new caulk won’t stick well.
It can come loose and let water sneak in behind it. That means mold and leaks could start causing trouble all over again.
Worse yet, bugs love tiny gaps to crawl through. So if your fresh layer of caulk isn’t sticking right because of the old stuff underneath, you’re giving those pests an open door into your space.
To keep your home safe and sound, getting rid of every bit of the old caulk first is pretty important before applying new beads of sealant.
The Importance of Removing Old Caulk
Before you go squeezing out a new line of caulk, let’s talk—the old stuff has got to go. Peeling away the past paves the way for primo adhesion and aesthetics; trust me, it’ll make all the difference when your fresh bead of caulk lays down like a dream.
Better adhesion for new caulk
Taking off the old caulk gives a clean slate for the new stuff to cling to. It’s like when you peel a sticker off something and stick on a fresh one—it holds better, right? Same with caulk.
A smooth, clean surface lets the new bead of caulk grab tight and stay put. This means no gaps or leaks, just a nice seal protecting against water and air sneaking in.
Using adhesive caulks that mix latex with silicone can really help too. They’re like super glue for your sealing jobs because they stick well and last longer. So when you lay down that line of caulk, it’s more likely to hold strong and keep doing its job for years.
Improved appearance
New caulk looks clean and sharp. It fills in gaps and makes edges look neat. Over time, old caulk can get dirty or moldy. This doesn’t look good at all. When you take off the old stuff and put on fresh caulk, it’s like giving your bathroom or kitchen a mini makeover! Fresh caulk shines and adds a tidy touch to sinks, tubs or windows.
Putting new caulk over the old does not give this nice effect. Edges can seem messy with bits of the old layer showing through. Sometimes colors don’t match either—old yellowed caulk peeking out from under bright white is no fun for anyone to see! Getting rid of what’s there first ensures that what you apply next really pops, making everything appear well-maintained and inviting.
Different Types of Caulk
Diving into the world of sealants reveals a variety of caulk options, each with its unique strengths and quirks. Understanding these differences is key to tackling any recaulking project with confidence—whether you’re sealing a bathtub or weatherproofing windows, there’s a caulk for that.
Acrylic
Acrylic caulk is a go-to for many because it makes a strong bond even if you’re adding new over old. But, pick the right type for your project! You might see acrylic latex caulk, or maybe a hybrid version, and don’t forget polyurethane.
Each one works best in certain spots. Use acrylic latex where things stay put, like around window frames that don’t move much.
You’ve got to be careful with silicone though—acrylic doesn’t stick well to it. If you try putting acrylic on top of silicone, it might not hold and can cause problems later on. Always check what’s already there before you start so you choose wisely and get the job done right the first time.
Silicone
Silicone caulk makes things watertight and airtight. It’s great for jobs in bathrooms and kitchens because it doesn’t let water through. You’ll see it around sinks, tubs, and toilets.
It sticks well to surfaces like glass, metal, and tiles but not wood.
You should know that once silicone dries, nothing else will stick to it – even more silicone won’t! That means if you need to fix or add caulk over silicone, the new layer may not hold up.
Silicone is easy on your wallet and found almost everywhere. It’s also used a lot for making molds because of how flexible yet strong it is after setting.
Polyurethane
Polyurethane caulk grabs surfaces really well. If you’re caulking things that move a lot, this might not be best since it’s not super flexible. Polyurethane becomes tough in certain weather, making it hard to work with.
It sticks great if the number is 45 or higher, but remember—tough to put on! This makes sure your job stays for a long time without gaps or cracks showing up. When you need something strong and lasting for outdoor projects, polyurethane can be the go-to choice because of its sticking power.
Just make sure everything’s clean first so the caulk can do its job right.
Preparation for Caulking Over Existing Caulk
Jumping the gun on re-caulking can lead to a host of headaches—preparation is key. A clean slate ensures your new caulk clings like it should, so let’s dive in and lay the groundwork for a caulking job that lasts.
Cleaning the area
Make sure the surface is clean before you start. Dirt, dust, and old bits of caulk won’t let the new stuff stick well. Rubbing alcohol is a good cleaner to use, especially if you’re dealing with silicone caulk.
It gets rid of oil and helps make sure the new caulk will hold.
Dry the area too after cleaning it. You don’t want any water hanging around when you apply caulk because it can cause problems later on. A nice, dry surface gives your new caulk its best chance to stay put and seal things up right.
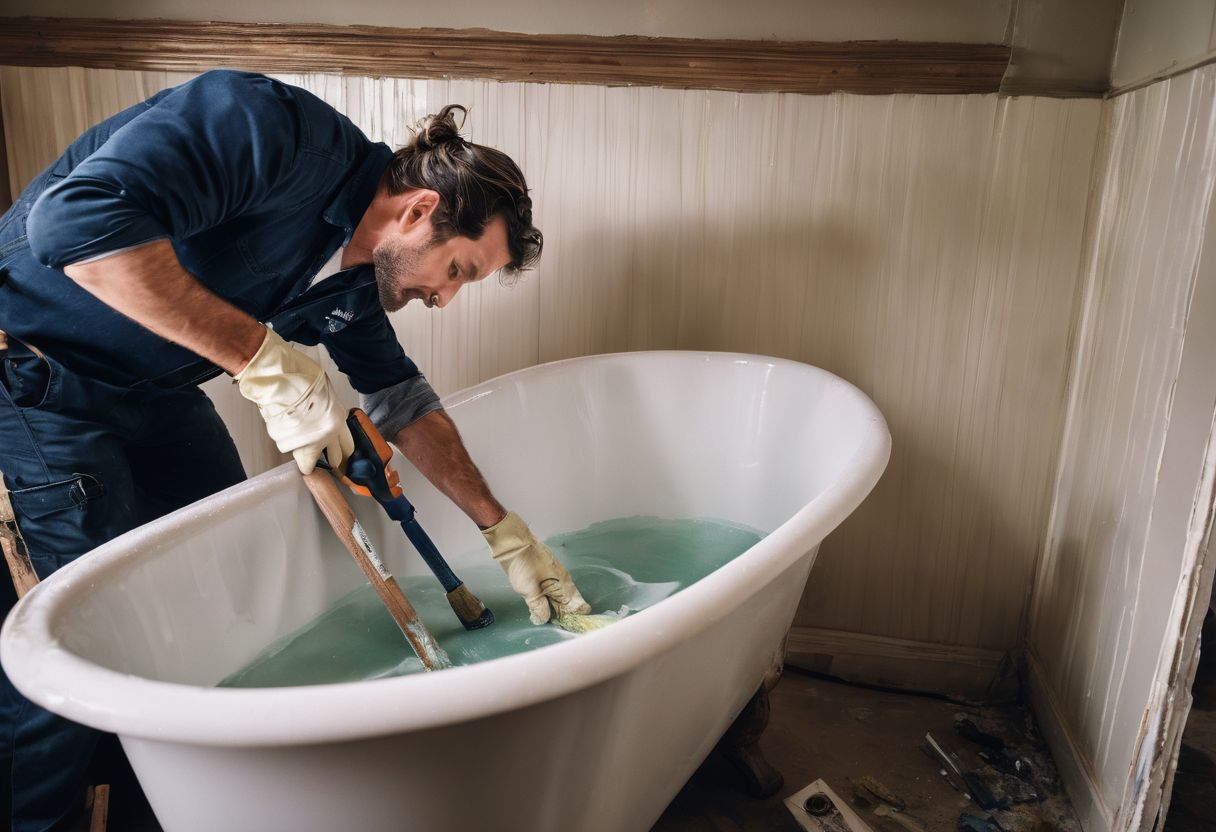
Properly removing old caulk
Properly removing old caulk is key to a successful recaulking job. Here are the steps you need to follow:
- Get your tools ready. You’ll need a putty knife or scraper, maybe even a caulk remover tool.
- Use a utility knife for slicing through the old caulk. Carefully cut along the edges where the caulk meets the surface.
- Pull up the loose ends of the old caulk. Start peeling it away from the surface with your hands or pliers.
- Apply a caulk remover gel if needed. This helps soften what’s left so it’s easier to scrape off.
- Give it time to work. Check the product label; some require you to wait a while.
- Gently scrape away remaining residue with a putty knife. Hold it at a low angle to avoid scratching surfaces.
- Wipe down the area with rubbing alcohol or a cleaner made for this job. You want it super clean for new caulk to stick properly.
- Let everything dry completely. Caulk won’t adhere well to damp surfaces.
Step-by-Step Guide for Caulking Over Existing Caulk
Ready to tackle that caulk job? Let’s dive into a no-nonsense, step-by-step guide crafted for those considering the layered approach—because sometimes, going over what’s already there is your game plan.
We’ll equip you with key insights so you can apply that fresh bead with confidence and finesse.. Stay tuned!
Choosing the right caulk
Picking the right caulk makes a big difference. For wet places like bathrooms, silicone caulk works best because it sticks well and keeps out water. This type doesn’t shrink and can handle different temperatures nicely.
If you need to paint over the caulk, acrylic latex is your go-to choice. It’s easy to work with and cleans up with water.
For tough jobs outside or gaps that move a lot, polyurethane caulk is strong and lasts long. Before you put new caulk on old caulk, check if they’re compatible; nothing sticks to silicone except more silicone.
Always pick a type of caulk that fits your project needs—whether you want it paintable or super waterproof—and use keywords like “apply the new”, “caulking over existing”, or “new layer” for specific solutions when searching online or at the store.
Applying the caulk
Squeeze the caulk tube gently, and a steady line will come out. Move the caulking gun along the crack where you want to fill in. Make sure it covers all gaps and is even on both sides.
If it’s your first time, don’t rush! Take your time to get a smooth bead of caulk.
After putting down the new caulk, wet your finger or use a tool to press it into place. This helps make the seal tight so water or air can’t get through. Always wait until the old caulk is dry before starting this job.
It keeps everything clean and makes sure that your hard work lasts longer!
Smoothing out the caulk
After you apply the new caulk, smooth it out. This makes sure you seal all the joints well and no gaps are left. Use your finger or a tool to push the caulk down into any spaces and make it look neat.
It’s best to do this in one go for a clean finish that keeps water and air out.
Sometimes, on cold days before winter, people make their homes warmer by smoothing caulk every few feet. This pushes the material deeper into cracks for better coverage. A good tip is to wet your finger or tool with soapy water before you start; this helps you glide over the caulk easier without sticking.
When to Avoid Caulking Over Old Caulk
Knowing when to skip the shortcut and avoid layering new over old is crucial—there are times when a fresh start is non-negotiable for your caulking project, but you’ll have to keep reading to uncover these critical scenarios.
When caulk is still in good condition
If the caulk is in good shape, it makes a strong base for more caulk. This means no cracks or loose pieces are waiting to cause trouble. You might think you can just add new caulk on top and be done.
But here’s the catch – even though it looks okay, putting fresh caulk over it isn’t the best move for lasting results.
Good condition caulk will hold up better if you leave it alone instead of adding more layers. It sets hard when dry, stronger than other types of sealants. So, if that first layer is solid and doing its job well, let it be! The goal is always to have a tight seal that lasts without extra repair work down the line.
When caulk is too old or damaged
Caulk won’t last forever—sun, rain, and temperature changes can make it fail. Cracked or peeling caulk just doesn’t do its job anymore. It’s important to check if the old stuff is silicone because new caulk won’t stick to silicone well.
If the existing caulking was not done right, it may need a complete redo. Taking out all that damaged material makes room for fresh caulk to adhere properly and look good.
FAQs
1. Can you just put new caulk on top of the old one?
Sure, you can apply new caulk over old caulk, but it’s best to check if the original is clean and in good shape — this helps make sure the new layer sticks well.
2. What should I do before putting on fresh caulk?
Before adding a second layer, clean up! Remove any dirt or loose pieces from the old caulk to help the new one grip better.
3. Does it matter what kind of caulk I use when going over an old layer?
Absolutely! The type matters — silicone or polyurethane caulks are strong choices. Remember: don’t mix types like putting silicone over acrylic; they may not play nice together.
4. If my old caulk is cracked, can I still go over it with a new one?
If your old caulking has cracks, pull it out first and then lay down the fresh stuff for a smooth finish that’ll last longer.
5. Is there anything special about applying caulking over silicone?
Yes indeed… When dealing with silicone, scrub well – maybe even replace completely – so your fresh bead stays put without peeling away later!
6. How long should I wait after using my tube of caulk before getting wet again?
After applying your bead of caulking, let it dry fully — often 24 hours or as directed on the tube label; patience ensures everything seals tight and avoids

Jonathan Fleck, a seasoned 40-year-old writer and editor, boasts an impressive 12-year career specializing in the dynamic realms of Home and Garden. As the Chief Editor of Home and Around Blog, Jonathan is at the forefront of curating content that resonates with enthusiasts and novices alike. His vast knowledge encompasses a range of topics, including houseplants, small space gardening, home DIY, small space living, and crafting.
Jonathan’s academic journey includes a graduation with a degree in the History of Art from Long Island University (LIU) in New York City, New York, United States. This educational background, coupled with his passion for creative expression, has shaped his unique approach to writing about the aesthetics and functionality of living spaces.
With a keen eye for detail and a wealth of experience, Jonathan has become a trusted voice in the Home and Garden community. His articles not only provide practical advice but also inspire readers to transform their living environments into personalized havens. Whether it’s cultivating a thriving indoor garden, optimizing small living spaces, or embarking on creative DIY projects, Jonathan Fleck’s expertise shines through, making him a respected authority in the field.