

Struggling to feel secure when working on your sloped roof? You’re not alone. Many homeowners and professionals face challenges when ensuring safety during roof maintenance or installation.
Here’s a fact: Roof jacks are indispensable tools that provide a stable platform on your steep roof, making your work safer and more efficient.
This article introduces you to the world of roof jacks, what they are, their types, how to install them properly, and tips for their maintenance. By understanding their essential role in roofing projects, you’ll be better prepared to tackle any job with confidence.
Ready to learn more? Keep reading.
What Is a Roof Jack and Its Function?
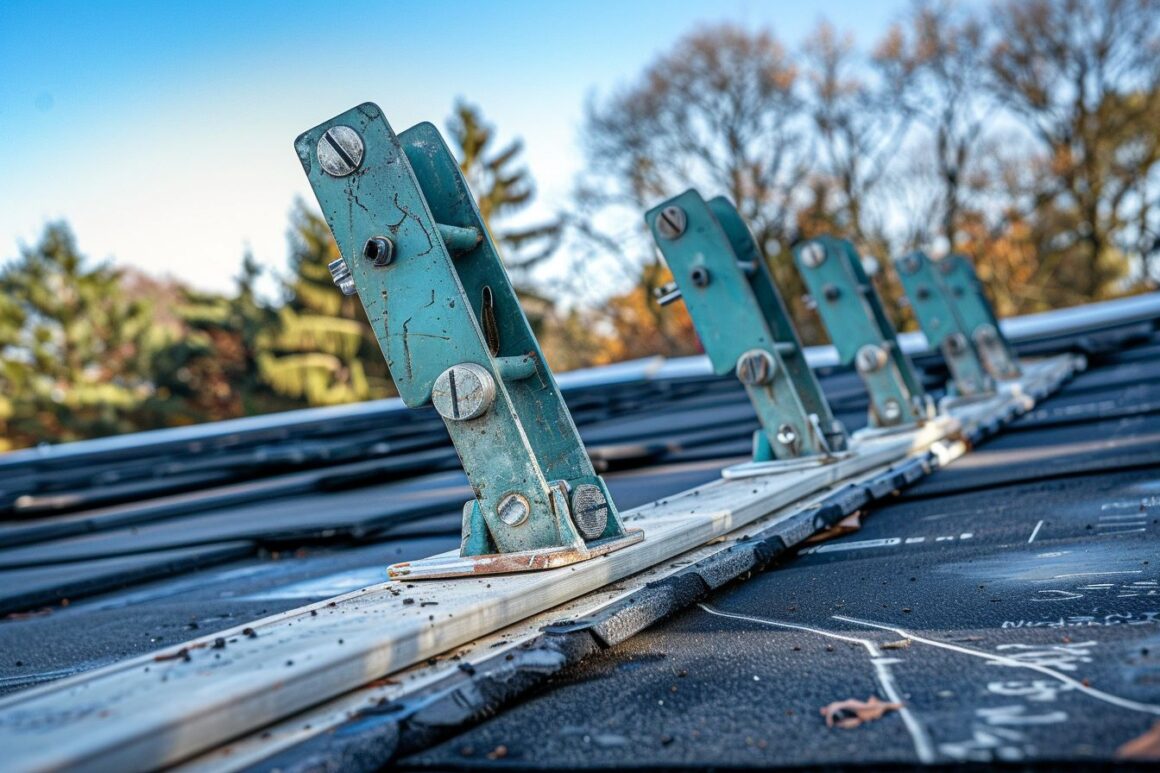
A roof jack is a tool used to support a stable work platform on a sloped roof. It helps workers repair or install roofing materials safely by preventing slips and falls.
Definition of a roof jack
A roof jack acts as a guard for any exhaust pipe or vent poking through the roof, working like a special kind of cover called flashing. It consists of parts including a cap, some insulation, a piece of flashing, and a ceiling plate.
These components together make sure vents and pipes on your roof are well protected and sealed off from elements outside.
For sealing around where the vent pipe meets the roof, plumbing vent jacks come into play. They’re premade flanges available in materials such as lead, rubber, or metal. This ensures that no water leaks into your home through the openings around these pipes by creating a tight seal.
Purpose and function

Moving from what a roof jack is, let’s focus on its purpose and function. Roof jacks play a crucial role in keeping your home safe and dry. They prevent water from sneaking into your house by sealing around pipes and vents on the roof.
This helps avoid leaks that could damage your attic or ceilings. For workers fixing or replacing shingles, roof jacks offer a stable place to stand. This makes working on steep roofs safer.
Roof jacks also act as a barrier against snow, rain, and debris for plumbing vent pipes. By doing this, they ensure these vents stay clear and functional all year round. Whether it’s blistering sun or icy hail, roof jacks work hard to protect your home’s structural integrity while aiding in essential attic ventilation.
Types of roof jacks (universal, custom, stainless steel, etc.)
Roof jacks play a crucial role in maintaining the safety and functionality of your roof. Different types cater to various needs, ranging from universal fits to custom designs.
- Universal Roof Jacks: These are the most common type. Designed to fit a wide range of roof pitches, they offer flexibility and convenience. Their adjustable nature ensures they can be used across different roofing projects, making them a popular choice among contractors.
- Custom Roof Jacks: Tailored for specific requirements, custom roof jacks fit unique roof shapes that standard types can’t accommodate. They are especially useful for roofs with unusual slopes or architectural features. Contractors often prefer these for specialized projects where precision is key.
- Stainless Steel Roof Jacks: Known for their durability and longevity, stainless steel roof jacks stand up well against harsh weather conditions. They resist corrosion and rust, which is essential for maintaining the integrity of your roof’s structure over time.
- Galvanized Steel Roof Jacks: Similar to their stainless steel counterparts in terms of durability, these roof jacks have an added layer of protection against corrosion thanks to their galvanized coating. Ideal for areas with extreme weather, they ensure long-term reliability.
- Adjustable Roof Jacks: Offering versatility, adjustable roof jacks can be modified to suit various roof pitches and profiles. This flexibility makes them a valuable tool for roofing contractors who work on diverse projects with different requirements.
Each type of roof jack serves a distinct purpose and choosing the right one depends on your roofing project’s specific needs, from the material used to the level of adjustability required. Whether you’re dealing with heavy snow loads or need support for rooftop equipment, there’s a roof jack designed to meet those challenges head-on.
How to Install Roof Jacks Properly

Installing roof jacks requires precision and the right tools. You’ll need to measure carefully, secure each jack firmly, and ensure they are weatherproofed for durability.
Steps for installation
Installing roof jacks correctly can protect your home and make working on the roof safer. Here’s how you do it, step by step.
- Identify where you need the roof jack, usually along the edge where you require support for planks or ladders.
- Gather all tools and materials before starting. You’ll need a hammer, roofing nails (10d to 16d), a ladder, and of course, your roof jacks.
- Secure a spot on the roof where the jack will go. Make sure it’s solid and stable.
- Drive two 16d nails into a rafter through the top holes of the roof jack bracket for firm attachment.
- For proper alignment, slide the new jack under a shingle tab near your work area; ensure it sits flush against the roof surface.
- Nail through the bottom strap of the bracket into the roof, using 10d to 16d nails for a secure hold that withstands weather conditions.
- If installing pipe jacks next to a roof vent, carefully lift adjacent shingles and remove any existing nails before sliding in the new jack.
- Check every installed jack by gently tugging to ensure they’re firmly attached.
- Repeat these steps as necessary along your work area to provide ample support.
Always wear proper safety gear during installation to avoid accidents or injuries.
Tools needed
Moving from the steps for installation, it’s crucial to focus on the tools you’ll need for installing your roof jacks correctly. Ensuring you have the right tools on hand can make the difference between a secure and efficient job and one that could potentially harm your roof.
Here’s a list of essential tools and their purposes:
- Ladder – Your access point to reach the roof safely. Make sure it’s stable and extends a few feet above the edge for safe entry and exit.
- Saw – Used mainly to cut through any roofing materials if adjustments are needed for fitting vent caps or flashing.
- Hammer – A basic tool, but indispensable for driving nails into place, securing the roof jack firmly.
- Nails – Specific to roofing applications, these should be durable enough to withstand weather conditions and hold everything securely.
- Adjustable Roof Brackets – Essential for installing wooden walk boards that provide a stable platform while working on steep roofs.
- Drill with Drill Bits – For creating pilot holes when attaching roof jacks directly into your home’s structure; this step helps prevent splitting in wood or damaging other materials.
In my own experience installing a roof jack during a DIY gutter update, I cannot emphasize enough how important it is to use quality materials and the correct tools. Not only do they improve efficiency, but they also ensure safety throughout the installation process. For instance, initially attempting to secure brackets without drilling pilot holes resulted in frustration, and more importantly, potential damage. Transitioning to using a drill not only expedited securing each component but also eliminated risk of harming our home’s exterior.
Remember, skipping on necessary tools or substituting them with ill-fitting alternatives often leads to complications down the line, ranging from minor annoyances like additional noise during windy days due to improper installation of vent caps, to serious issues like water intrusion.
Investing time in gathering these items before beginning your project can save hours or even days of effort later by preventing common mistakes before they happen. Plus, having everything ready goes a long way toward maintaining your roof’s integrity over time, ensuring that elements like snow and debris won’t pose problems after your new roof jack is in place.
Common mistakes to avoid
Installing roof jacks plays a key role in keeping your home safe from water damage. It’s easy to make mistakes, but knowing what to avoid can save you time and money. Here are some common errors I’ve come across during my own experiences with installation and maintenance:
- Choosing the wrong size: One of the biggest missteps is selecting a roof jack that doesn’t fit your roof’s pitch or type. This mistake compromises the effectiveness of the roof flashing, leading to potential leaks.
- Placing them incorrectly: Roof jacks need precise placement to function properly. I once had to redo an entire section because I initially placed them too far apart, failing to provide the necessary support.
- Skipping regular inspections: After installing your roof jacks, it’s vital to check them regularly for signs of wear or damage, especially after severe weather. Neglecting this can result in unnoticed issues worsening over time.
- Forgetting about weather resistance: Not all roof jacks offer the same level of protection against the elements. I learned this the hard way when I installed a non-weather-resistant type in an area prone to heavy rains, which quickly led to rust and degradation.
- Using poor quality materials: Initially opting for cheaper materials might seem like a good idea for your budget, but it often leads to early replacement needs. Investing in high-quality products from reputable manufacturers pays off.
- DIY without proper knowledge: My neighbor decided to install their roof jacks without professional help or sufficient understanding of the process, an attempt that resulted in incorrect installation and eventually calling in experts for repairs.
- Overlooking small details during setup: It’s crucial not just where but how you install roof jacks; small dabs of cement should be used on each hole, and color granules pressed into the cement for enhanced sealing and protection, steps that are easily overlooked by beginners.
By avoiding these frequent errors, you’ll ensure a smoother installation process and extend the life of your roof jacks significantly. From personal experience, taking these precautions seriously makes all the difference between a job well done and one that requires costly fixes down the line.
Maintenance and Longevity of Roof Jacks

Keeping roof jacks in top shape means regular checks and choosing the right materials, read on to learn how!
Regular inspections
Check your roof often to spot problems early. Look for signs like missing tiles, sagging gutters, and damaged shingles. These issues can lead to bigger problems like leaks. Leaks cause mold, water damage, and rot if not fixed quickly.
I learned this the hard way when I ignored a small leak in my porch roof last year. The damage got worse over time and ended up costing me more.
Getting a professional to inspect your roof can also help find safety hazards. They have the tools and knowledge to spot things you might miss. This includes weak beams that could collapse if not repaired.
Regular checks ensure your roof stays strong and lasts longer without major issues.
Weather resistance
After closely inspecting roof jacks, it’s essential to delve into how they stand up against the forces of nature. Roof jacks are the unsung heroes shielding your home from relentless weather assaults.
Made from tough materials like galvanized steel or aluminum, these components endure through harsh conditions, be it scorching sun, heavy snowfall, or pelting hail storms. My own experience echoes this resilience; after installing quality roof jacks on my Oklahoma home, I noticed a significant drop in leaks and damage that were once common with seasonal changes.
Roof jacks don’t just resist weather, they excel at it. Their construction is specifically aimed at battling every precipitation type and temperature swing thrown their way. By opting for durable roof jacks, you guarantee an extra layer of defense for your roofing system against continuous deterioration caused by extreme weather shifts.
The peace of mind that comes from knowing your roof is armoured against such elements is invaluable a sentiment many homeowners share after making the wise decision to install or upgrade their roof jacks.
Quality materials
Manufacturers use metal and plastic to make roof jacks because these materials last long and handle bad weather well. I’ve seen how durable metal roofs are compared to others. They don’t wear out quickly, making them a smart choice for any home.
From my experience, installing quality roof jacks means you won’t have to replace them often.
Keeping your roof in top shape includes picking the right materials for every part, including the jacks. Metal and plastic options not only withstand storms but also add years to your roof’s life without constant worry or need for replacement.
This approach saves time, money, and stress over the long haul.
Conclusion
Roof jacks create a safe space for workers on sloped roofs. They need nails for attachment and can have vent caps. Different materials like galvanized steel make them durable against weather.
Installing them correctly ensures safety and effectiveness. Their role in worker safety and roof maintenance is critical.
FAQs
1. What exactly is a roof jack?
A roof jack is a type of hardware, used to prevent leaks around your chimney, pipes, and other areas on your roof. It acts like a secret shield, keeping water out.
2. How do roof jacks work?
They’re installed directly onto the roof, usually near vents or chimneys. Roof jacks create a tight seal that stops water from getting into your home.
3. Do I need different types of roof jacks for my kitchen and bath fans?
Yes, you’ll need specific types of flashing for different areas – like kitchen and bath fans – to ensure proper ventilation and leak prevention.
4. Can I install roof jacks myself?
You can, but it varies by complexity. For basic installations, DIY might be okay; however, contacting us ensures it’s done right the first time.
5. When should I call you to install my roof jacks?
If you’re unsure about installation or if your home needs special attention, don’t hesitate; call us today! We’ve got the tools and expertise to secure your home against leaks.

Jonathan Fleck, a seasoned 40-year-old writer and editor, boasts an impressive 12-year career specializing in the dynamic realms of Home and Garden. As the Chief Editor of Home and Around Blog, Jonathan is at the forefront of curating content that resonates with enthusiasts and novices alike. His vast knowledge encompasses a range of topics, including houseplants, small space gardening, home DIY, small space living, and crafting.
Jonathan’s academic journey includes a graduation with a degree in the History of Art from Long Island University (LIU) in New York City, New York, United States. This educational background, coupled with his passion for creative expression, has shaped his unique approach to writing about the aesthetics and functionality of living spaces.
With a keen eye for detail and a wealth of experience, Jonathan has become a trusted voice in the Home and Garden community. His articles not only provide practical advice but also inspire readers to transform their living environments into personalized havens. Whether it’s cultivating a thriving indoor garden, optimizing small living spaces, or embarking on creative DIY projects, Jonathan Fleck’s expertise shines through, making him a respected authority in the field.