
Need help with a slow or clogged bathroom sink? You’re not alone. Many homeowners face the hassle of dealing with drain issues, often because of improperly installed or maintained pop-up drains.
Here’s something to think about: The key to a smoothly functioning pop-up drain lies in its correct installation and routine upkeep.
Our guide explains everything you need to know about pop-up drains, from choosing the right type for your sink to the nuts and bolts of installation and tips for trouble-free maintenance.
Ready for a cleaner, more efficient bathroom sink? Let’s start!
What is a Pop Up Drain?
A pop-up drain is a fancy plug for your sink. It lets water flow out when open and keeps it in when closed.
Components
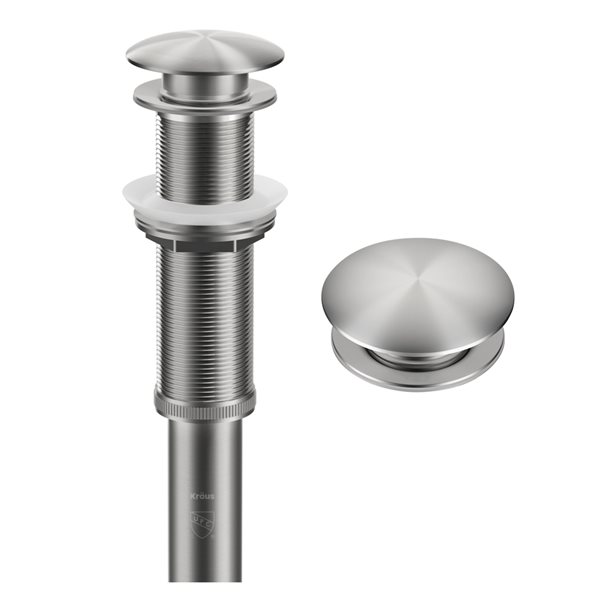
A pop-up drain has several key parts, including the lift rod, pivot rod, pop-up stopper, and seals or gaskets. The lift rod sits at the top of the faucet and controls the stopper in the sink.
When you pull it up or push it down, it moves the pivot rod. This motion opens or closes the stopper to hold water under your sink or let it drain out.
Seals and gaskets help keep everything tight and leak-free. They fit around various parts of the assembly to prevent water from escaping where it shouldn’t. These components work together to make sure your sink can hold water when needed and drain when full.
Different types of pop-up drains
Pop-up drains vary widely to fit different sinks and uses. Some come with an overflow feature, which is great for bathroom sinks that need a safety net against water spilling over the edges.
Others lack this, making them perfect for vessel sinks where the basin sits above the counter. Materials differ, too; chrome, nickel, brass, and even matte finishes are available.
These options allow your drain to match or contrast with other fixtures in your bathroom.
Choosing the right pop-up drain also means thinking about function and style. Push-button models offer a modern touch with simple press-to-seal action, while traditional lever-operated drains add classic appeal to any sink setup.
Each type has its installation steps but follows similar principles for maintaining smooth operation and preventing leaks under your sink.
How to Properly Install a Pop Up Drain
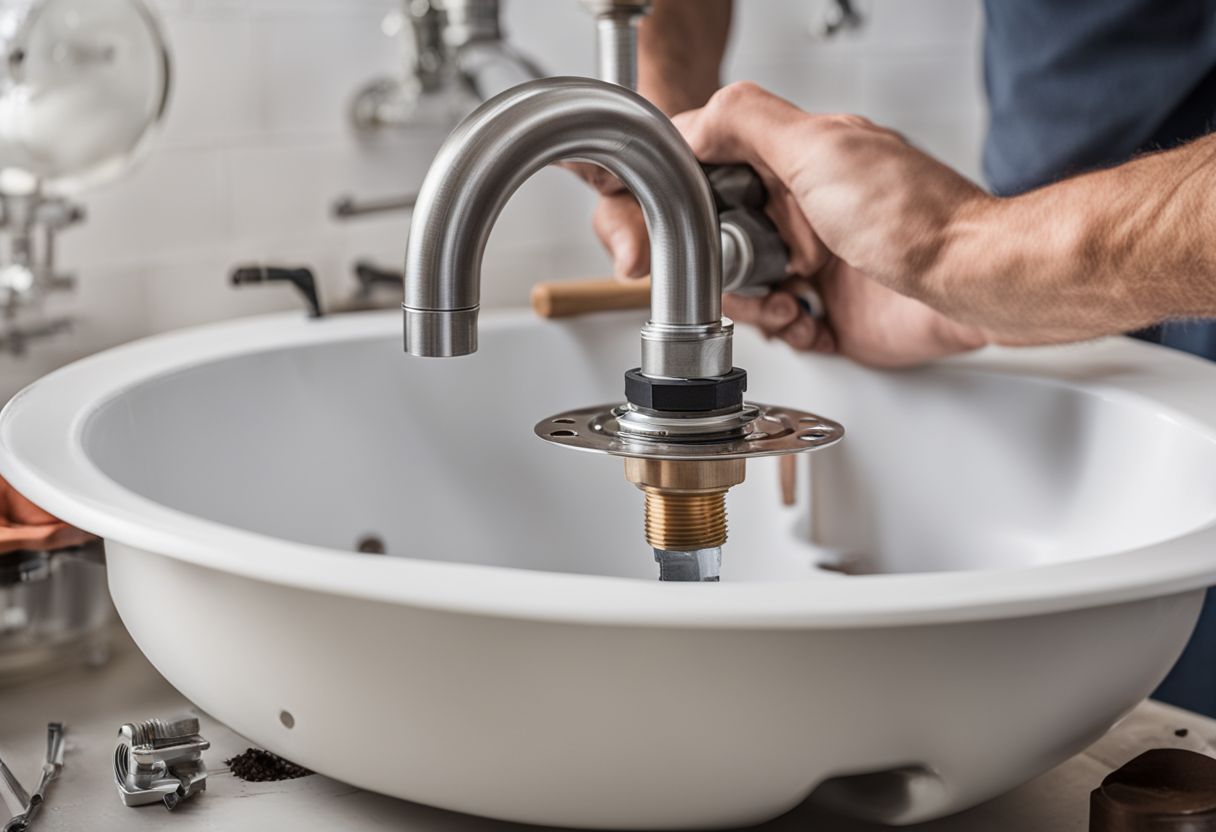
Installing a pop-up drain starts by getting the sink and drain hole ready. Then, fitting the flange in place and securing it forms your next step.
Preparing the sink and drain hole
First, clean the sink and drain hole. Make sure there is no dirt or old putty. It keeps leaks away. Next, check that your new pop-up drain parts are all there. It would help if you had a flange, stopper, and some other bits.
Put the plumber’s putty around the bottom of the flange. Gently insert it into the sink’s drain hole, pressing down to make sure it fits well. The putty will help seal any gaps, keeping water from leaking under the sink.
Installing the drain flange
Slide the drain tailpiece through the hole from under the sink. Then, screw the flange onto it tightly. Make sure you clean any old caulk or putty from around the drain hole first.
Put the new plumber’s putty under the chrome ring before you set everything in place.
If you need to remove the nut, push it up on the flange from below until it pops free. If it’s stuck, use a putty knife to help loosen it. This will ensure that your new pop-up lavatory drain fits well and works without leaking.
Attaching the pop-up rod and lift rod
Hold the pivot rod while you unscrew its gasket. Then, carefully pull it from the tailpiece to free the stopper from your sink. Next, attach a small clip to connect the lift rod and hold it tightly in place, ensuring that when you push or pull on this rod, your drain opens and closes as needed.
The lift rod itself goes up and down through a hole at the back of the faucet body.
For smooth movement, make sure that the pivot rod links correctly inside the drain’s tailpiece. This step makes sure that when you use your faucet’s lift rod, everything works together flawlessly to control your pop-up drain’s opening and closing actions.
Always check each connection is secure for trouble-free operation every time you use it.
Connecting the drain pipe
To connect the drain pipe, start by wrapping the plumber’s tape around the tailpiece threads. It helps create a tight seal and stops leaks. Next, attach the tailpiece to the sink drain hole at the bottom of the sink.
Make sure it fits well. Then, take your branch drain pipe and join it to this setup.
Firmly tighten every turn, but be careful not to overtighten things. It could crack your pipes or fittings! Once all parts are securely connected, including the expansion tank, run water through to check for any drips or leaks..
If you spot an issue, tighten up those connections just a bit more until everything stays dry.
Troubleshooting Common Installation Issues
When things go sideways with your pop-up drain installation, like a nut sticking out or a stopper not working right, we’ve got fixes for you to try. Keep reading and find what works!
Dealing with a protruding nut
A protruding nut can stop your drain from working right. Tighten the pivot nut to fix issues with the stopper. If it’s too tight or loose, the stopper won’t work well. Make sure to adjust it so everything moves smoothly.
Fixing a nut that sticks out helps avoid leaks and ensures the pop-up works as expected. Check the strap assembly and tighten the holding nut for a snug fit. A correctly adjusted nut makes sure your sink drains without trouble.
Proper use of plumber’s putty
Plumber’s putty is a must for sealing the base of faucets and sink fixtures. It’s made for plumbing jobs like setting up faucets, basket strainers, and pop-up drains. Before placing it onto the sink, it would help if you rolled it into a ring that fits around the drain or faucet base.
It creates a watertight seal that keeps water from leaking under the sink.
To use plumber’s putty right:
- Take some and warm it in your hands until it’s easy to shape.
- Press it around the bottom of the drain or faucet where it meets the sink.
- After setting it in place, wipe away any extra putty to keep things tidy.
Always check if the plumber’s putty works with your sink material; some types need silicone instead due to staining issues.
Adjusting the lift rod and stopper
Check the lift rod on your bathroom sink drain if it’s not working right. Sometimes, you need to adjust the lift rod and stopper to make sure they close and seal properly. Look at how these parts fit together.
You might have to tighten or loosen something to get it right.
Make sure the pop-up assembly is set up correctly, too. If the stopper doesn’t stay down, check the pivot rod underneath. It may need a quick fix or adjustment. Putting everything back in order ensures your sink works without any leaks or problems.
How to Maintain
Keeping a pop-up drain clean ensures it works well. Fix leaks quickly to prevent bigger problems.
Regular cleaning and maintenance
Cleaning your drain is a must. You need to remove the plug or stopper to get rid of any debris. It keeps things running smoothly. Every once in a while, add some lubrication for the moving parts.
It helps everything work better.
Fix small leaks when you see them. Also, take time to clean out hair and gunk from the stopper and drain pipe. Doing this stops big clogs before they start. Make sure all parts move well and replace anything that’s worn out or broken.
Fixing minor leaks
To fix minor leaks in a pop-up drain, check the clicker assembly first. If it’s not working right, replace it. This step can prevent leaks from happening. Also, wrap Teflon tape around the tailpiece threads and branch drain pipe.
Make sure to wrap the tape clockwise. This helps prevent water from leaking out of your sink drain assembly. Sealing these areas tight with Teflon tape is key to a leak-free pop-up drain.
Leaks often come from parts that are not sealed well enough. Using plumber’s tape on threads can make a big difference. Check all connections and tighten them if needed, but be careful not to overtighten and cause damage.
Regular checks and quick fixes will keep your pop-up drain working well without messy leaks.
Conclusion
Installing and maintaining a pop-up drain is easy if you follow the right steps. First, make sure your sink is dry before you start. Then, check the clicker assembly and replace it if needed to keep everything running smoothly.
Always tighten parts by hand to avoid damage. Lastly, clean and check your drain regularly for a smooth operation. These tips will help your bathroom stay in top shape!
FAQs
1. What’s a pop up drain?
A pop-up drain is a device that lets water flow out of your sink without letting things fall in. It can come with or without an overflow option, depending on your sink.
2. How do I install a pop up drain?
First, put the rubber gasket under the flange. Then, place the drain body through the sinkhole from above. Underneath, add the washer and locknut, and tighten to secure. For drains with overflow, connect it to the overflow hole using a pipe.
3. Can I use any pop up drain for my bathroom sink?
Only sometimes! You need to check if your sink has an overflow feature. Choose a “drain with overflow” for sinks with this feature and “without overflow” for those without.
4. Why does my pop up drain have extra parts like a rubber gasket?
These parts ensure everything fits snugly and prevent leaks under your sink; they’re essential!
5. How often should I clean my pop up drain?
Give it a quick clean once a month to prevent build-up that can cause clogs, just remove it, wash with soapy water, rinse well, and put back.
6. My pop up drain stopped working; what should I do?
Check if something is blocking its path first, if clear but still not working right,, you might need to replace it or call someone who knows more about fixing these things.

Melissa Fannin, a 34-year-old with a flair for design and a wealth of experience, has spent seven years honing her skills in the realms of decoration and home improvement writing. Her academic journey laid a solid foundation for her creative pursuits, earning her a Bachelor of Science degree in Architecture from a prestigious institution in Newark, New Jersey 07102, USA.
Armed with a background in architecture, Melissa brings a unique perspective to the world of home aesthetics. Her articles seamlessly blend artistic vision with practical insights, offering readers a comprehensive guide to enhancing their living spaces. Melissa’s passion for creating visually appealing and functional environments has made her a standout figure in the field.
Currently serving as a Senior Editor at Home and Around Blog, Melissa plays a pivotal role in curating content that inspires and informs readers about the latest trends and innovative approaches to decoration and home improvement. Her writing not only reflects her expertise but also serves as a source of inspiration for those looking to elevate their living spaces. Melissa Fannin continues to shape the discourse around home design, bringing a fresh and knowledgeable perspective to the ever-evolving world of decoration and home improvement.