
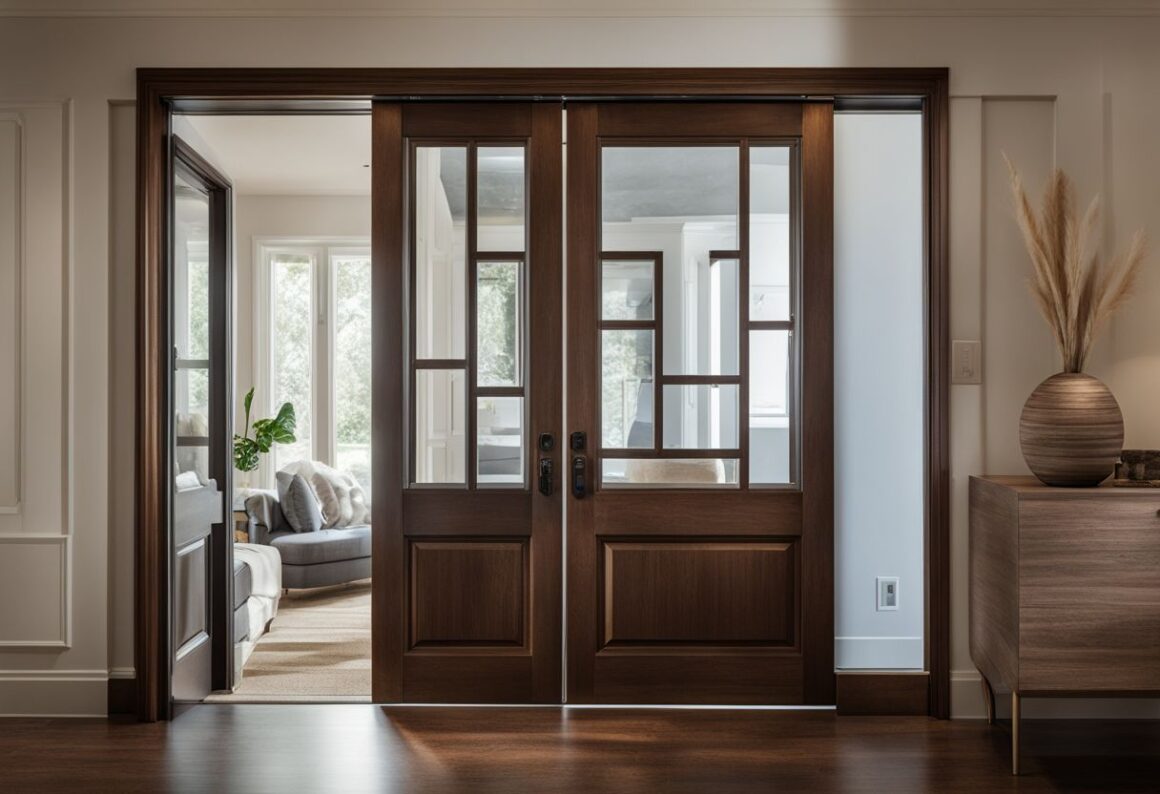
Stuck with a jammed pocket door that just won’t glide? Pocket doors save space but can be tricky beasts when they go off track or need maintenance. Our guide is primed to walk you through each step, ensuring you can remove your pocket door without causing any damage.
Read on—door freedom awaits!
Core Findings
- You need the right tools like a screwdriver, pry bar, hammer, and gloves to safely remove a pocket door.
- Carefully take off trim and molding around the door first without damaging your walls.
- Use a screwdriver to disconnect rollers from the track then lift out the door.
- Keep parts organized by labeling them for easy re-installation or replacement.
- Protect floors and walls with covers during work to keep your area clean.
Understanding the Components of a Pocket Door
Before you dive into the world of pocket doors, it’s essential to get acquainted with their anatomy. Knowing how each part – from the sneakily hidden track to the all-important door panel – works together, is key for a hassle-free removal experience.
So let’s unlock this mystery and ensure you know your rollers from your frame before we roll up our sleeves.
Track and rollers
Pocket doors glide on a track and rollers are the secret to their smooth slide. These parts are super important for your door to move easily. If something goes wrong with them, your pocket door might get stuck or not work right.
To fix it, you pull the door out and lift those rollers off the track.
A handy guide can show you how all this stuff works together. It tells you about carriers that hold the rollers up high on the track. To set up a new pocket door, you hang some pieces called hangers on top of your door first.
Then you add wheels, which go into that track so your door can roll back and forth with no trouble. If parts like these stop working well, maybe because they’re old or broken, switching them out helps your pocket door run smooth again.
Door frame and hardware
The door frame holds everything in place and is where the pocket door slides back and forth. Hardware like rollers, tracks, and latches let the door move smoothly and stay secure when shut.
To get a pocket door out, you must first take care of this metal or plastic hardware. This means you will unscrew parts from the top of the door and sometimes unclip them from their track.
If your goal is to fix a pocket door without removing the frame or replacing it with a new one, remember that careful removal of these pieces is key.
Removing a pocket door involves dealing with screws and nails around the edge of your doorway too. The frame is often trimmed down to fit into walls better, using skinny wood strips called 1x3s.
When taking off these strips, it’s important not to damage any surrounding drywall or paint so that putting things back together looks nice and neat.
Door panel
A door panel is the part of your pocket door you see and touch every day. To get it out, you need to free it from its hidden space in the wall. First, look for any screws or clips that hold the door to its track above.
You might have to slide the door back and forth a bit to spot these fasteners. Once you find them, grab your screwdriver and unscrew them carefully.
Removing a pocket door can seem tricky since they hide inside walls. But with your tools ready, lift up gently on one side of the panel after you’ve removed all attachments. Keep a steady hand here – you don’t want to scratch nearby walls or floors! If everything goes well, your once-hidden door should now be free from its secret spot.
Tools and Materials Needed for Removing a Pocket Door
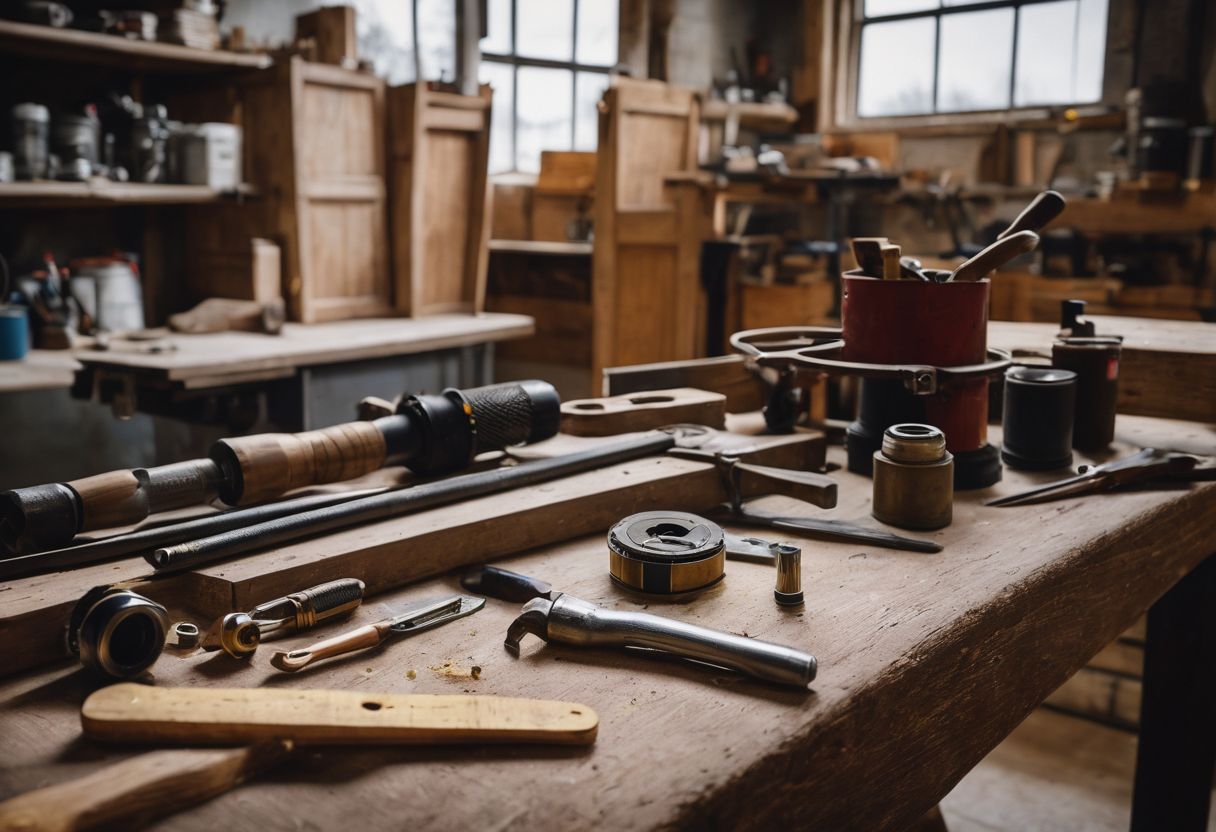
Taking out a pocket door needs the right tools and materials. Before starting, gather everything to make the job smooth and safe.
- Screwdriver: You’ll use this to unscrew the hardware on your pocket door.
- Pry bar: This helps you carefully remove trim or molding without damaging your walls.
- Hammer: Sometimes you need a little extra force—use a hammer for nudges or removing nails.
- Work gloves: Protect your hands with gloves, especially when dealing with sharp edges or splinters.
- Masking tape: Use this to mark areas around the door that need special attention or protection.
- Stiff putty knives: These can help pry off trim pieces gently and can also be used for scraping away excess material.
- Pry bars: If you need more leverage than a putty knife provides, a larger pry bar will come in handy.
- Stud finder: Locate studs in the wall easily with this tool; it’s important when removing the track system of your pocket door.
Step-by-Step Guide to Removing a Pocket Door
In our comprehensive guide, we simplify the process of detaching your pocket door from its secretive nook – so grab your toolkit and follow along for a smoother transition to renovation success.
Remove trim and molding
Taking off the trim and molding is your first step. You’ll want to do this carefully to avoid damaging the door or walls. Here’s how you make it happen:
- Grab a utility knife, and score along the edge where your trim meets the wall. This helps prevent the paint from peeling.
- Use a small pry bar or a putty knife to gently pry the trim away from the wall. Start at one end and work your way down.
- Slowly loosen each piece of trim by moving the tool along its length. Take care not to break the wood if you plan on using it again.
- Once loose, pull off each piece of trim and set them aside. Be sure to keep nails or screws in a safe place if you need them later.
- Check for any leftover nails or staples in the wall, and remove these with pliers or a claw hammer.
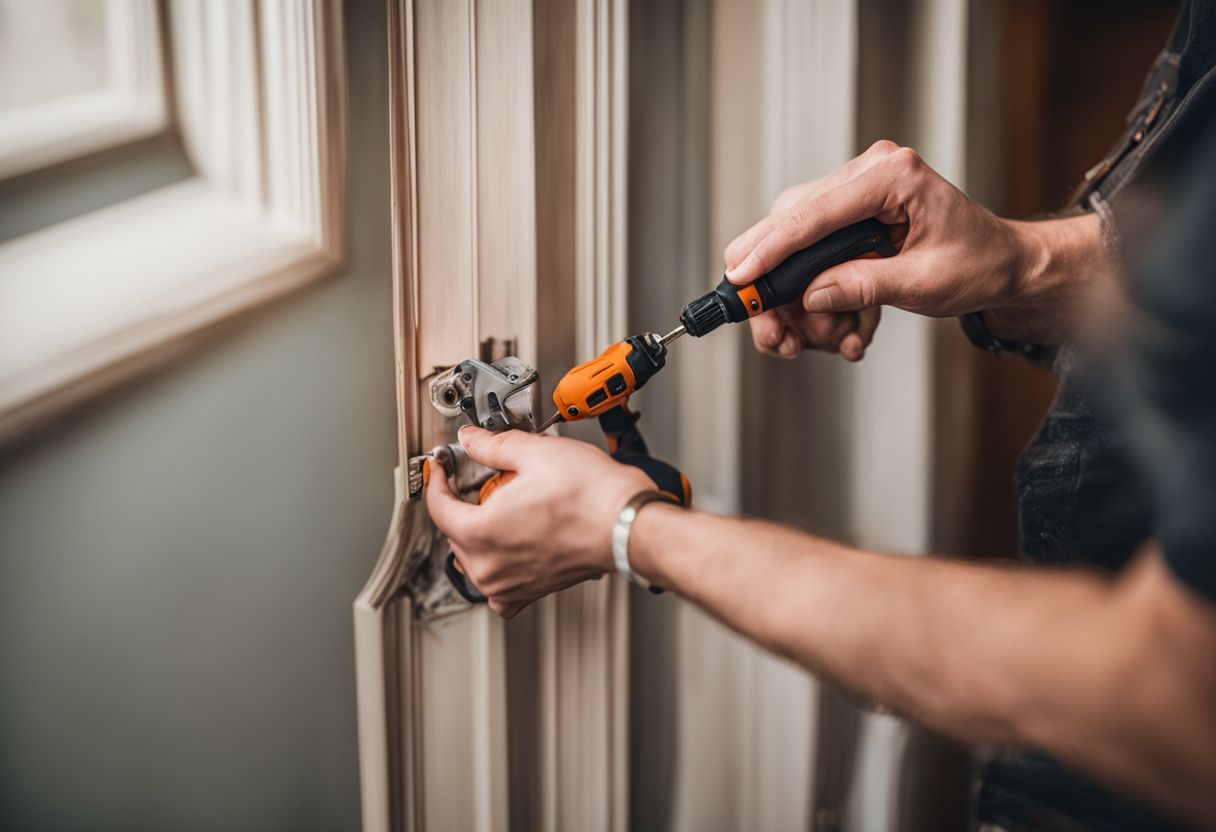
Disconnect door from track
Disconnecting the pocket door from the track is a critical step. You’ll need a screwdriver for this part, and having someone help you hold the door can prevent accidents.
- Look up at the top of the door where it meets the track to find the trolleys. These are small wheels or rollers that let your door slide.
- With your screwdriver, reach up and carefully loosen, but don’t remove, the screws holding one of the trolleys in place.
- Gently push or pull on the edge of the door to tilt it slightly. This will make more room to work with the trolleys.
- Have your helper support one side of the door. It keeps things stable while you work on detaching it.
- Using both hands, lift one side of the door upwards. Aim to free that side’s roller from its track.
- Now head over to the other side of your pocket door with your screwdriver ready again.
- As someone holds onto that side of your door so it doesn’t fall, start loosening but not fully taking out this trolley’s screws.
- Carefully angle this side upwards just like before – once loose enough, this roller should also come off its track.
- Both rollers should be disconnected now. The next move is carefully balancing and guiding your pocket door out from its opening.
Lift and remove door from pocket
Taking out a pocket door is like solving a puzzle. You have to do each step just right. Here’s how you lift and remove the door from its cozy spot in the wall:
- Stand close to the door opening and get a good grip on the door edges.
- Gently pull the door towards you until it stops moving.
- Look for the lower guide at the bottom of the door; it keeps your door sliding straight.
- Unscrew this guide using your drill or screwdriver, so the bottom of the door is free.
- Now, peer up at the top of your pocket door; you’ll see rollers that slide along a track.
- Use both hands to lift the door straight up as high as it goes. The rollers need to come out of their track.
- Angle the bottom part of your door towards you while keeping an eye on those rollers.
- Once you’ve got a clear view, guide those rollers out from their happy place on the track.
- Be extra careful – doors can be heavy! Lower it gently down to your side and away from its pocket home.
Remove track and hardware
Taking off the track and hardware from a pocket door needs care. Proper steps can prevent damage to the wall and ensure a smooth process.
- Start by opening the pocket door fully. This gives you more room to work.
- Look for screws or bolts holding the track in place. These are usually on top of the door frame.
- Use a screwdriver or drill to take out all the screws. Keep them in a safe place if you plan to re – use them.
- Gently pull down on the track to free it from its position. Sometimes it might need a little wiggling.
- Check for any extra parts attached to the track, like stops or guides.
- Remove these pieces with your tools, being sure not to lose them.
- With the track now detached, inspect it for wear or damage. Decide if you can fix it or if it needs replacing.
- Find all screws and fasteners on the existing door hardware.
- Unscrew each piece carefully. You might need different types of screwdrivers for this part.
- Take off any remaining brackets or clips that held your pocket door in place.
- Make sure nothing is left that could scratch or dent other parts as you pull out the track.
Precautions and Tips for a Safe and Smooth Removal Process
Navigating the removal of a pocket door is all about precision—think surgeon-like focus. Keep your workspace clean, your mind sharp, and ensure every screw and shim has its place for a seamless transition from stuck to smooth sliding.
Use proper tools and equipment
Having the right tools makes removing a pocket door easier and safer. You’ll need screwdrivers to take out screws, tack welding equipment for any metal parts, and a hacksaw to cut through tough materials.
Make sure you have these items on hand before you start. They help you work efficiently and avoid damaging your door or the wall around it.
Work smart by using tools designed for each step of the process. This means less chance of things going wrong. For cutting or unscrewing, choose quality gear that fits well with your pocket door’s hardware.
Good equipment helps ensure everything goes as planned, from lifting the door off its track to putting in a new track if needed. Keep safety in mind too; always wear protective gear like gloves and goggles when handling tools.
Protect surrounding area
Cover floors and walls near the pocket door with drop cloths or old sheets. This step keeps paint, dust, and debris from making a mess. Use painter’s tape to secure the covers in place so they don’t move around while you work.
Be careful with your tools, especially if you use a saw near the wall. A slip could scratch or dig into surfaces you didn’t mean to hit. Always cut away from yourself and keep a steady hand on your tools for everyone’s safety.
Label and organize removed parts
Keep all the parts you take off your pocket door in order. Put labels on them so you know where they go later. This is a big help to keep things from breaking while you work. You can use simple stickers or tape and a marker for this.
Make sure to put the parts somewhere safe after you label them. This helps your job stay neat and avoids losing anything. Find a spot close by where nothing will get stepped on or lost while you fix or replace your pocket door.
Conclusion
Now you know how to take a pocket door off its track. Follow each step carefully, and you’ll do fine. Remember, taking your time can prevent mistakes. With the right tools and some effort, that door will be out in no time.
Good luck with your project!
FAQs
1. What do I need to know about how to remove a pocket door?
To remove a pocket door, you must first take the door off its track, usually without having to get rid of the whole frame. It’s about understanding your door trim and rollers.
2. Can I fix a pocket door that’s off track without taking out the whole thing?
Yes, indeed! You can often adjust a sliding pocket door or put it back on track by accessing the hardware without needing to remove any wallboard or jamb.
3. How do you replace an old pocket door with a new one?
First, remove the old one from its rollers and slide it out of the opening; then, with care and precision—install your shiny new pocket door in place!
4. Do I have to take off all the trim to fix my pocket door?
Nope – for simple fixes like adjusting or getting your pocket door back on track… leave that trim alone! There are tricks like using adjustment screws so you won’t disturb your interior design.
5. What if I want to replace my swinging door with a sliding pocket version?
Ah, good move – they save space! You’ll need some DIY skills: take out that swinging gate, prepare for some framing work… And soon after? Slide into style with your new addition.
6. When removing a stubborn old sliding panel from its hideaway spot, what’s key?
Patience is crucial here! Use sharp tools carefully as you detach parts – remember Johnson hardware kind of trickery might be involved — then ease out that stubborn piece from where time has made it stick.

Melissa Fannin, a 34-year-old with a flair for design and a wealth of experience, has spent seven years honing her skills in the realms of decoration and home improvement writing. Her academic journey laid a solid foundation for her creative pursuits, earning her a Bachelor of Science degree in Architecture from a prestigious institution in Newark, New Jersey 07102, USA.
Armed with a background in architecture, Melissa brings a unique perspective to the world of home aesthetics. Her articles seamlessly blend artistic vision with practical insights, offering readers a comprehensive guide to enhancing their living spaces. Melissa’s passion for creating visually appealing and functional environments has made her a standout figure in the field.
Currently serving as a Senior Editor at Home and Around Blog, Melissa plays a pivotal role in curating content that inspires and informs readers about the latest trends and innovative approaches to decoration and home improvement. Her writing not only reflects her expertise but also serves as a source of inspiration for those looking to elevate their living spaces. Melissa Fannin continues to shape the discourse around home design, bringing a fresh and knowledgeable perspective to the ever-evolving world of decoration and home improvement.