
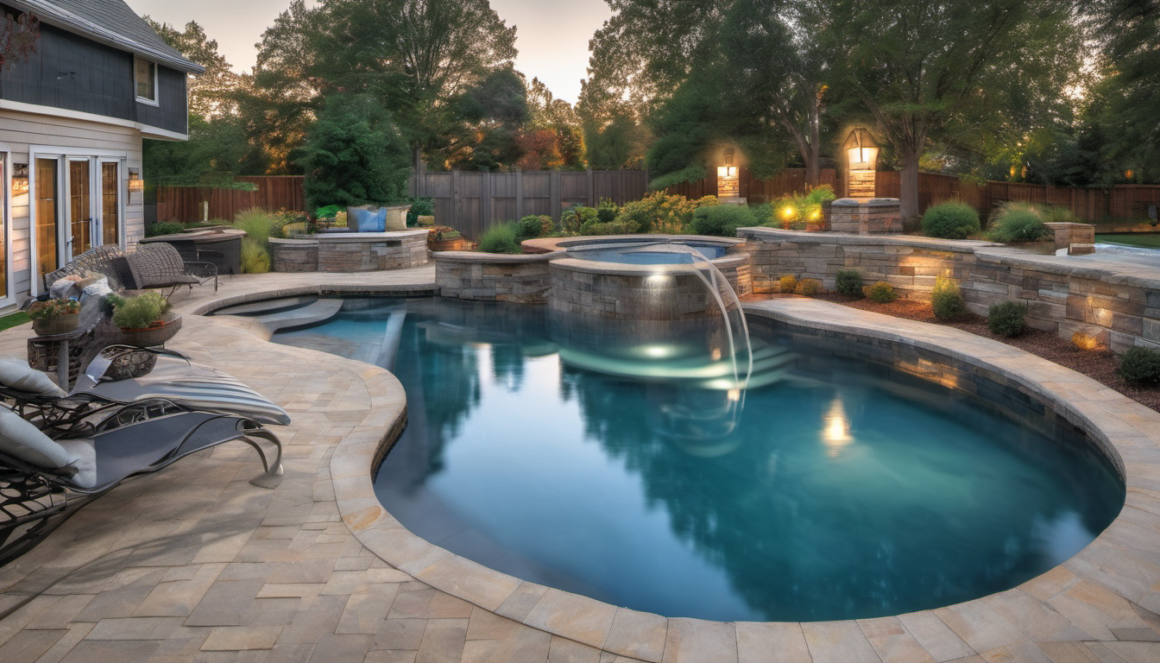
Have you ever seen your pool light flicker and fade, leaving your evening swims a little dim? Pool lights don’t last forever, and eventually, they require a swap-out. This blog will guide you through the safe and simple steps on How To Change A Pool Light Bulb Safely And Easily by yourself.
Dive in with us for a hassle-free fix!
Primary Lessons
- Always turn off electricity at the circuit breaker before touching the pool light to avoid shock.
- Use a towel for a better grip and to keep your hands dry when changing the bulb.
- Make sure to replace with the correct type of bulb and apply gasket lubricant to prevent leaks.
- After installing the new bulb, reassemble housing parts carefully and check wires are secure with electrical tape if needed.
- If considering an upgrade like LED or color – changing lights, consult a professional for installation.
Assemble Tools and Supplies

Before you dive into the nitty-gritty, let’s get our ducks in a row – it’s time to gather up all those trusty tools and supplies. Think of it like prepping for a little DIY adventure; you wouldn’t go on a treasure hunt without your map and compass, right? So grab that towel (trust me, it’ll come in handy), find that new sparkling bulb eager to light up your pool nights, snatch your screwdriver from the depths of your toolbox..
oh, and don’t forget the gasket lubricant – because nobody likes a leaky light situation! Now, with everything at arm’s reach, we’re set to plunge into this project headfirst!
Towel
Grab your trusty towel – it’s a real game-changer here! Wrap the edge of the fixture with it for a solid grip. This handy trick keeps your hands from slipping, especially if they’re wet from splashes or sweat.
You don’t want that light fixture to slip and shatter; that’d be a real mess! So, keep the towel close because as you unscrew and lift out the pool light, it’ll help you hold everything steady.
Plus, once you’ve got that old bulb out and are ready with the new one, use the towel again to clean around the housing before popping in the replacement. It’s simple but super effective – just like magic!
Replacement bulb
You’ll need the right bulb for your pool – it’s a must. Halogen bulbs are sensitive, so don’t touch them with your hands or they could go bad fast. Best practice? Use a cloth or gloves when handling these tricky lights.
Now, screw in that new bulb but easy does it; too much force and you might break something.
Make sure to get a bulb that fits just right, like finding the perfect pair of shoes. A mismatch can lead to trouble down the line and we don’t want that happening while you’re trying to enjoy a night swim.
Once everything is lined up neatly, give that bulb a gentle twist – think turning the key in a lock – until it’s snug as a bug! And hey, if you’re ever unsure about what bulb to buy, take your old one along on your shopping trip; let it be your guide.
Screwdriver
A screwdriver is your trusty partner for this job. It’s the key to unlocking your pool light from its housing. You’ll need a Phillips screwdriver because those are the kind of screws keeping the light safely in place.
Just like a treasure chest, you use it to unscrew that one big screw, and voila, you’re on your way to changing that bulb!
Don’t worry if you’ve never used one before; handling a Phillips screwdriver is as easy as turning the lid on a jar—just match up the tip with the cross on top of the screw and twist left to loosen.
Remember how much fun it was using tools in your toy building set as a kid? Think of this as adult playtime—but with very real benefits!
Gasket lubricant
You’ll need to grab some gasket lubricant before you start working on your pool light. This isn’t just any kind of lube; it’s a special silicone-based stuff that helps make sure the gasket gets a tight seal.
Don’t even think about using petroleum jelly—big mistake! It can break down the gasket, and you’ll have to do this all over again way sooner than you’d like.
After replacing your bulb, get that lubricant on the gasket right away. You want to keep water out and let that light shine bright without any trouble. A good layer of this magic goo means you’re sealing things up just right, so water stays where it’s supposed to be – in the pool and not messing with your new bulb.
Electrical tape
So, you’re swapping out that pool light bulb? Good move! Now, grab some electrical tape. You’ll need it for the wires to keep them safe and snug. It’s like a superhero’s cape for your connections – wrapping around those points where wire meets wire.
This magic black stuff blocks water from getting in and causing a big no-no: electricity mixing with water.
Got all your soldered spots covered? Awesome! That electrical tape makes sure nothing zappy can ruin your day—or your swim. Just wind it tightly, giving every spot a good squeeze with this insulating wonder tape.
Safety first, right? Plus, it gives you peace of mind to take that victory dip after fixing up the light without any worry about pesky electric shocks.
Turn Off Electricity

Alright, first things first—let’s zap the risk right out of the job by powering down. You’ll want to make a beeline for your circuit breaker and give the old “off” switcheroo to wherever your pool light gets its juice.
Trust me, mixing electricity and water is only cool when you’re talking about natural phenomena like lightning over the ocean—not so much when you’re knee-deep in pool water fiddling with wires.
Locate breaker for pool light
Before you dive into replacing that pool light, you’ve got to find the breaker. Safety first! This is mighty important—you don’t want any surprises from electricity while working with water.
That could be a shocker, literally. So get to your electrical panel and hunt down the switch labeled for your swimming pool’s lighting system. Not sure which one it is? No problem; just call in a pro to help out.
Once you’re sure about the right circuit breaker, flip it off. Now you’re all set to tackle that bulb without worrying about electric currents zapping their way through the pool water.
Got the power turned off? Great job! You can breathe easy now and move on with confidence to pull that light fixture out of the water next. Just keep in mind—electricity and water are like cats and dogs; they just don’t mix well at all! Keep things dry around here, folks.
Turn off power
Got the breaker located? Great! Now, we need to cut off electricity to keep things safe. Flip that switch and make sure all power to your pool light is completely off. This is super important because water and electricity are a dangerous mix.
Double-check that the lights don’t turn on when you hit the switch—better safe than sorry!
With the power out, you can relax a bit—there’s no risk of shock now. But still, stay sharp and focused as you get ready for the next step: pulling that light fixture out from its cozy spot in your pool wall.
Remove the Light From the Pool
Alright, let’s dive right in—figuratively speaking of course, we’re not getting wet yet! You’ve got your trusty towel in hand (because who wants to wrestle with a slippery pool light?), and it’s time to tackle the beast: removing that pool light from its cozy underwater nook.
Use towel for grip
So you’re ready to tackle the light housing, huh? Grab a towel first. This isn’t just any regular old step— it’s your secret weapon for a no-slip grip. When that stubborn fixture doesn’t want to budge, wrap the towel around it and hold tight.
It gives you the extra strength you need to twist and pull without turning into a slip-and-slide act.
Now let’s talk bulb business. Hold onto your new bulb with the same trusty towel; it keeps those pesky fingerprints off and ensures you don’t drop it right into the pool (because who wants to dive for bulbs?).
Carefully screw that shiny new light back in place, feeling like a pro all thanks to that handy-dandy piece of cloth in your hands.
Unscrew and remove light fixture
Got a good grip on the light? Great! Now, let’s get that fixture off. You’ll need your screwdriver for this part. Look for screws around the edge of the light. They might be hiding under some water gunk, but they’re there.
Take ’em out one by one and put them somewhere safe—you’ll need them soon.
With all screws out, you can pull the fixture from its niche in the pool wall. It might feel snug, so go slow and steady. If it’s being stubborn, use a flathead screwdriver to gently pry it loose—but be careful not to crack anything! Got it out? Awesome—set it down on your towel away from any splash zone.
Disassemble the Pool Light Housing
Alright, let’s dive into the nitty-gritty – we’re tackling that pool light housing! Think of it like performing surgery on a UFO.. except it’s underwater and less sci-fi. You’ll be prying off that face ring like a pro, peeling away the gasket with finesse (and maybe whispering apologies for disturbing its slumber), all while keeping an eagle eye out for any signs of wear or tear.
It’s not just about swapping bulbs; it’s about giving your pool light a full spa treatment!
Remove face ring, gasket, and lens
First things first, let’s take apart that pool light housing. You’ll need to get those screws or clamps off the face ring. Be gentle when you pull apart the lens and gasket—these bits keep water out of your bulb, so they’re super important! Now everything’s open, and you can see the old bulb just waiting to be switched.
Next up is cleaning these parts before putting them back together. Dirt and bugs love to hang out here, but we want that light shining bright, not muddled. So give ’em a good wipe down while inspecting for any wear or cracks—a busted gasket won’t do us any favors once we dive into replacing the bulb.
Clean and inspect components
So, the face ring, gasket, and lens are off. Now it’s time for a close look and a good clean. Take out any dirt or water you see on the light housing. Check out every part to make sure they’re all looking good.
No cracks or bad stuff should be on these parts, especially that gasket—it keeps water from getting in. If there’s any old grease on it, wipe it away before you put new gasket lubricant on.
Now grab that towel again and start cleaning around where the bulb goes. Get rid of any yucky stuff so your new pool light will shine bright! Look over the wiring too; everything needs to be safe before you screw in that shiny new bulb.
Taking care here means less trouble later—and nobody wants to fix something twice!
Replace the Light Bulb
Alright, folks – it’s showtime! Grab that new bulb because we’re about to perform a little poolside magic. It’s as simple as unscrewing the old one and tightening in the fresh sparkler – think of changing a lightbulb in your living room lamp, but you get to wear swim trunks (bonus points if they’re festive)! And remember: “righty-tighty, lefty-loosey” hasn’t let us down yet.
Unscrew old bulb
Okay, so you’ve got your dry towel in hand. It’s time to take out the old bulb. Grip it firmly with the towel and turn it left—counterclockwise—that’s the way! Slowly twist until that little rascal comes loose.
You don’t want any slip-ups here, especially not with electricity involved.
Got the old one free? Great job! Now toss it gently aside but remember where you put it—we need a clean area for working on that shiny new bulb you’re about to install. Keep those fingers steady; we’re almost there!
Screw in new bulb
Got the old bulb out? Great! Now, grab your new one. Make sure you’ve got a towel handy in case your hands are slippery. You don’t want to drop that shiny new bulb! Carefully start twisting it into the socket.
Keep turning until it’s snug – but hey, not too tight! Remember to dab a bit of that dielectric grease on there. It’ll help keep water out and make sure your pool light shines bright without any hiccups.
Done with that part? High five to you! Just take a second look to ensure everything’s looking good before moving on. No cross threading or funny business here—we’re going for smooth sailing, or should I say, ‘smooth lighting‘? Now our pool is one step closer to lighting up the night again!
Reassemble Housing
Well, you’ve done the hard part—out with the old bulb and in with the new! Now it’s just like a jigsaw puzzle (but thankfully one where all the pieces fit): putting that pool light housing back together.
Just imagine slathering on some of that gasket lubricant like you’re icing a cake.. Okay, not quite – but trust me, this next step is a piece of cake.
Replace lens, gasket, and face ring
Got the new bulb in? Great! Now, grab that clean lens and put it back on top. Make sure to line it up just right. Next comes the gasket—it’s super important for keeping water out, so give it a good check to make sure it’s not cracked or broken.
If you’ve got some of that gasket lubricant, now’s the time to use it. This helps create a watertight seal and makes future changes easier.
Snap on that face ring you took off earlier and tighten all those screws well—but don’t go Hulk on them; just snug enough will do. There! All sealed up and ready to shine again. But before we light up this pool party again, we need to get this fixture back underwater where it belongs.
Use gasket lubricant
After you’ve got the new bulb in, it’s time for the gasket lubricant to shine. Grab that tube of silicone pool lube and get ready to use it! This stuff is like a magic barrier—it keeps water out so your light stays safe and dry.
Just smooth some around the rubber seal before you put everything back together. It makes sure your pool light can do its job without any unwanted leaks.
Now that everything’s lubed up and looking good, you’re all set to reassemble the housing. With a careful touch, place the lens back on, then slide in the gasket—you know, that rubbery ring—and finish with snapping on that face ring.
It might feel like a puzzle at first, but once it all fits snugly into place, you’re just moments away from seeing your pool glow again!
Secure with electrical tape if needed
Sometimes, the little things make a big difference. Imagine you’ve got your light housing all set up, but there’s something not quite right. You check the wiring—yup, it’s connected just like it should be! Now what? Here comes electrical tape to save the day.
Wrap it around any loose wires or connections that need a little extra hold. This helps keep everything safe from water when you put the fixture back into its poolside home.
You might think of electrical tape as a superhero in these situations—it sticks where you need it and can handle getting wet without losing its grip. So if anything seems wobbly or exposed during reassembly, don’t hesitate to use this trusty sidekick! It may seem simple but securing your connections with this tape is key for keeping that new bulb shining bright without any hiccups.
Return the Light to the Pool and Restore Power
Alright, here we go—time to dive back in! With your pool light bulb snug as a bug in its newly polished home, it’s just about time to see that bad boy shine. Gently lower the fixture into its cozy niche, feelin’ like you’re tucking it into bed after a long day.
Flip the switch on and..voilà! Watch as your pool lights up like a Fourth of July sky—without any fireworks necessary. Now stand back, admire your handiwork, and maybe even take a victory lap around your pool deck—you’ve earned it!
Carefully place light fixture back in pool
Now it’s time to slide the light fixture back where it belongs. Take care not to bump or drop it, as that could hurt the bulb you just put in. Make sure all that extra wire gets tucked into the wall neatly so nothing sticks out or gets pinched.
Once everything is back in place, carefully tighten each screw to lock the light securely inside its home under the water.
You’ve got this part covered—just reattach that face ring and make sure your gasket sits tight with a dab of lubricant if needed. This will keep water out and let your new bulb shine bright without any trouble.
Gently push your pool light fixture into its niche until it looks just right, ready for a swimmer’s delight!
Turn power back on
Alright, you’ve gently put the light fixture back underwater where it belongs. It’s time to make that bulb shine! Flip the switch on your circuit breaker to “on” to get electricity flowing again to your pool light.
If any breakers tripped, no sweat—just push them all the way off and then back on again. You’ve got this! With the power restored, take a step back and enjoy seeing your pool glow with new light.
Nice work!
Upgrading or Changing Your Pool Lighting Assembly
9. Upgrading or Changing Your Pool Lighting Assembly: You’ve mastered the art of swapping out that old bulb—kudos to you! But hey, why stop there? Dive into a sea of possibilities with LED or color-changing lights to jazz up your nighttime swims; it’s like throwing a pool party and letting the water be the disco ball.
Sure, some techy stuff might be involved, so bringing in a pro could be your ticket to upgrading without getting your wires crossed (pun intended!).
Consider LED or color-changing options
So, you’re thinking about making your pool lights pop with some color? I’ve got to say; it’s a game-changer. LED pool lights don’t just save you money on the electric bill—they offer over 80% in energy savings—but they also splash your swim space with colors that can dance to any tune.
Imagine a light show right in your own backyard every time you take a dip.
These aren’t your everyday bulbs either; we’re talking thousands of color combos! Talk about setting the mood without even trying—just press that remote or hit the switch and watch the magic happen.
Feel like blue waves tonight? Or how about tango red for those hot summer evenings? With an upgrade to LED, you’re not stuck with one look; change is literally at your fingertips. Want my advice? Go for it—it’s all bright moves here!
Consult a professional for installation
If you’re thinking about upgrading or changing your pool’s light assembly, that’s a job for a pro. Sure, you might be handy with a screwdriver and have changed a bulb before, but this is different.
Pool lights are fancy these days – we’re talking LEDs, color-changing magic, the works! A professional knows how to handle all of that without making waves.
Getting help from someone who does this kind of work every day means they’ll get it done right and safely. You won’t need to scratch your head over instructions or worry about messing up something important.
Plus, they’ve got all the right tools and know-how to make sure everything stays dry where it should and bright when you flip the switch. Trust me (and those who really know their stuff), calling in an expert is worth it here.
FAQs
1. How do I change my pool light without getting the water out?
Well, you don’t need to drain your pool to change a light bulb. Just turn the power off, pull out the fixture, and replace the bulb right there on the side of your pool. Easy as pie!
2. Can I switch an old light for a fancy LED in my swimming pool?
Sure thing! If you want that snazzy LED glow, just remove your old light housing and pop in a new LED one – remember to cut the power first though!
3. What if I can’t reach my pool light to change it?
No sweat! Most times you can just tug gently on the cord and bring that bad boy right up next to you outside of the water—then go ahead and swap that bulb.
4. Do I have to be careful when changing a burned-out pool bulb?
Absolutely – safety first! Make sure all power is off by hitting that light switch or turning off whatever powers your pool before working on it.
5. Is replacing my entire underwater lamp housing difficult?
Nah, not really — once you’ve got everything unplugged safely, unscrew what needs unscrewing and take out what needs coming out… then reverse those steps with your shiny new piece!
6. Will cool water mess up putting in a hot new bulb?
Not at all! The cool water won’t cause any harm to your replacement bulbs – just make sure everything’s dry where it should be during installation, alright?

Jonathan Fleck, a seasoned 40-year-old writer and editor, boasts an impressive 12-year career specializing in the dynamic realms of Home and Garden. As the Chief Editor of Home and Around Blog, Jonathan is at the forefront of curating content that resonates with enthusiasts and novices alike. His vast knowledge encompasses a range of topics, including houseplants, small space gardening, home DIY, small space living, and crafting.
Jonathan’s academic journey includes a graduation with a degree in the History of Art from Long Island University (LIU) in New York City, New York, United States. This educational background, coupled with his passion for creative expression, has shaped his unique approach to writing about the aesthetics and functionality of living spaces.
With a keen eye for detail and a wealth of experience, Jonathan has become a trusted voice in the Home and Garden community. His articles not only provide practical advice but also inspire readers to transform their living environments into personalized havens. Whether it’s cultivating a thriving indoor garden, optimizing small living spaces, or embarking on creative DIY projects, Jonathan Fleck’s expertise shines through, making him a respected authority in the field.